Fill Div With Vertically And Horizontally Centered Image Using CSS
September 17, 2017 by Andreas Wik

As web developers we work a lot with dynamic content, and this can be quite tricky from time to time. We can’t (shouldn’t) force people to crop images to exact sizes before uploading them on our sites. It’s important that we put effort into making our solutions as flexible as possible while still lookin’ good.
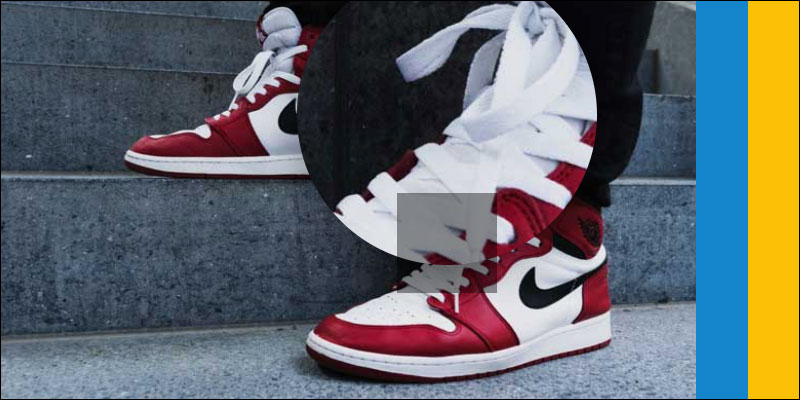
Card based web design is really popular, and this is an excellent example of when you might run into the problem we will solve right here and now. Let’s say you are running a website where users post inspirational quotes together with an image.
Here’s a demo using this technique. Download it as a zip here.
As you can see in the demo it doesn’t matter if the image is tall or wide or square. The center of the image will always be what is shown. Resize the window and you will see how it follows along.
Let’s start with the markup for the card.
<div class="card">
    <div class="card-image-container">
        <img src="img/trainspotting.jpg">
    </div>
    <div class="card-text-container">
        What shall we do with the drunken sailor?
    </div>
</div>
Next, it’s time for the CSS.
.card {
    width: 300px;
}

.card-image-container {
    width: 100%;
    height: 150px;
    position: relative;
    overflow: hidden;
}

.card-image-container img {
    min-height: 100%;
    min-width: 100%;
    position: absolute;
    top: -9999px;
    bottom: -9999px;
    left: -9999px;
    right: -9999px;
    margin: auto;
}

.card-text-container {
    width: 100%;
    height: 100px;
    background-color: #ffffff;
}
The interesting stuff here is the styling of .card-image-container and .card-image-container img.
First .card-image-container
Set the position to relative and overflow to hidden to ensure that the parts of the image that doesn’t fit in the container is not visible.
Then .card-image-container img – the image inside the container (duh)
Set the minimum width and height to 100% to ensure that it stretches and fills up its container div. Set its position to absolute, add the same negative value all around it, and set margin to auto – all of this to make sure the image is centered.
That’s it. Pretty nice!
And with that, I’ll close for now.
Until next time.
Share this article